Tutorial for Query Writers
About this Tutorial
This tutorial is designed for SQL-proficient builders who need to bridge the gap between a cloud data warehouse and a spreadsheet.
While traditional spreadsheets break under the weight of large datasets, Row Zero enables you to work with massive datasets directly from your source of truth. By the end of this tutorial, you will be able to transform raw SQL queries into governed, auto-updating data sources that your entire team can use.
In this tutorial you will:
- Import data from a cloud data warehouse into a workbook.
- Publish a query as a no-code data source.
- Configure scheduled refreshes to automatically rerun queries.
- Implement query variables for dynamic filtering during import.
Prerequisites:
- SQL proficiency: You should be comfortable writing and debugging SQL queries.
- Active connection: This guide assumes a connection to a data warehouse (e.g., Snowflake, Databricks, Redshift) has already been configured in Row Zero.
Note: This tutorial does not cover administration or integrations. For those topics, refer to our launch guides and documentation. This tutorial also does not cover spreadsheet features like functions, pivot tables, formatting, or charts. For those topics, refer to our Tutorial for Spreadsheet Users.
Overview: What Is Row Zero?
Row Zero is a high-performance spreadsheet that connects directly to your data warehouse, combining the flexibility of a spreadsheet with the scale of a database.
Key Concepts and Navigation
To build effectively in Row Zero, it is important to understand the relationship between workbooks, connections, and data sources.
Connections are integrations with external data warehouses, databases, or cloud storage. Connections can be configured to allow import, writeback, or both. Connections handle authentication and permissions.
Workbooks are spreadsheets that contain data, formulas, and/or visualizations. Workbooks support a variety of use cases, including modeling, analysis, and dashboards. You can import data from connections into your workbooks by directly querying connections or inserting data from a data source.
Data sources are published queries. They are used to manage governed “source of truth” datasets or to give less technical users direct access to live data without writing SQL.
When you log into Row Zero for the first time, your home page will look something like this:
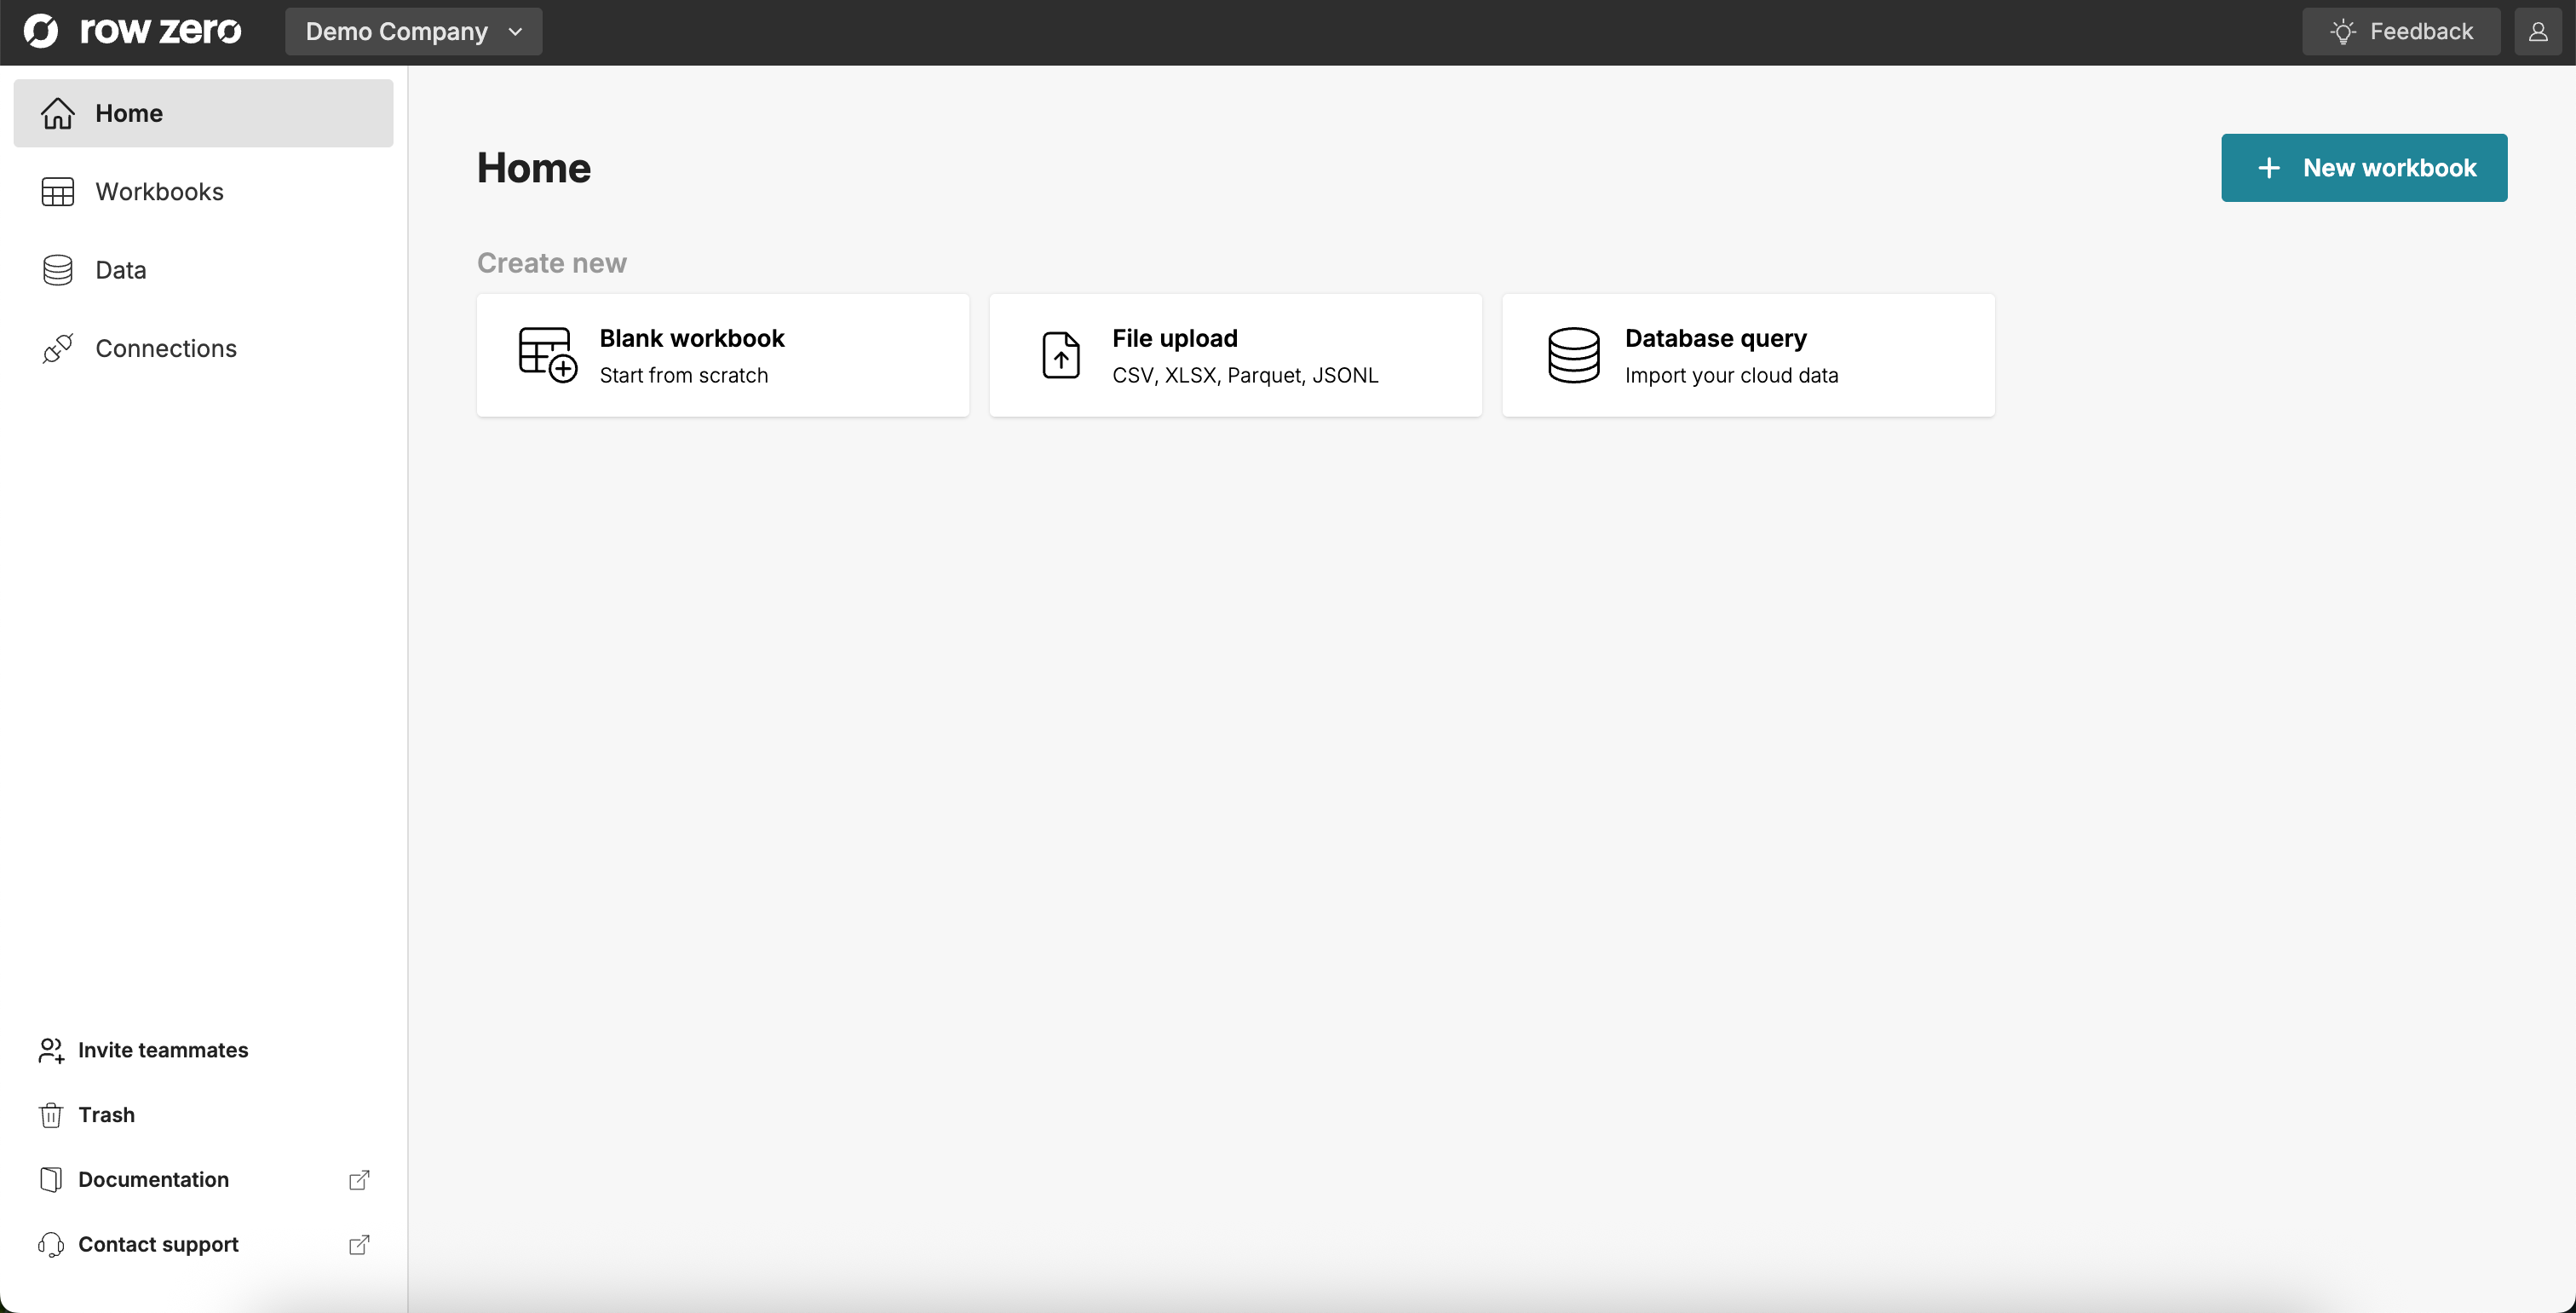
Use the menu on the left side to navigate to a new section:
- Home: Once you've created workbooks or data sources (or others have shared them with you) this page will give you quick access to your most recent files.
- Workbooks: A list of all workbooks you have created or that have been shared with you.
- Data: The list of published data sources that you have created or that have been shared with you.
- Connections: Where you manage your credentials and integrations for external data warehouses.
Create a Workbook and Import Data
In this section, you’ll create your first workbook and import data from a connection.
Create a Workbook
To create a new workbook, click Blank workbook from your home page. Give your workbook a name by clicking Untitled Workbook at the top. Let’s name this workbook “Query Writer Tutorial”.
Import Data into a Connected Table
Row Zero supports several methods for importing data, but this tutorial will focus on importing from a connection (e.g. Snowflake, Databricks, Redshift).
To import data from a Connection, open the Data menu, and then choose the connection you want to query by clicking + next to the connection name.
In the Configure connected table side panel, select your database and schema (if applicable), write your SQL query, and click Run. Row Zero executes this query directly against your connection.
The results from your query will be imported into a connected table. You can navigate back to this side panel anytime by double clicking the connected table, or by right clicking the connected table and selecting
Edit connected table.
A Connected Table is a type of data table. Data tables sit on top of your worksheet and are stored in the upper-left cell that they cover. Connected tables include all the data from the imported dataset, and because these datasets are often millions of rows, they usually will have a scroll bar on the right side of the table. These tables are read-only, so data within the table cannot be overwritten, but you can refresh the data in your Connected Table by rerunning your query (click Run). More information on working with data tables can be found in the Tutorial for Spreadsheet Users.
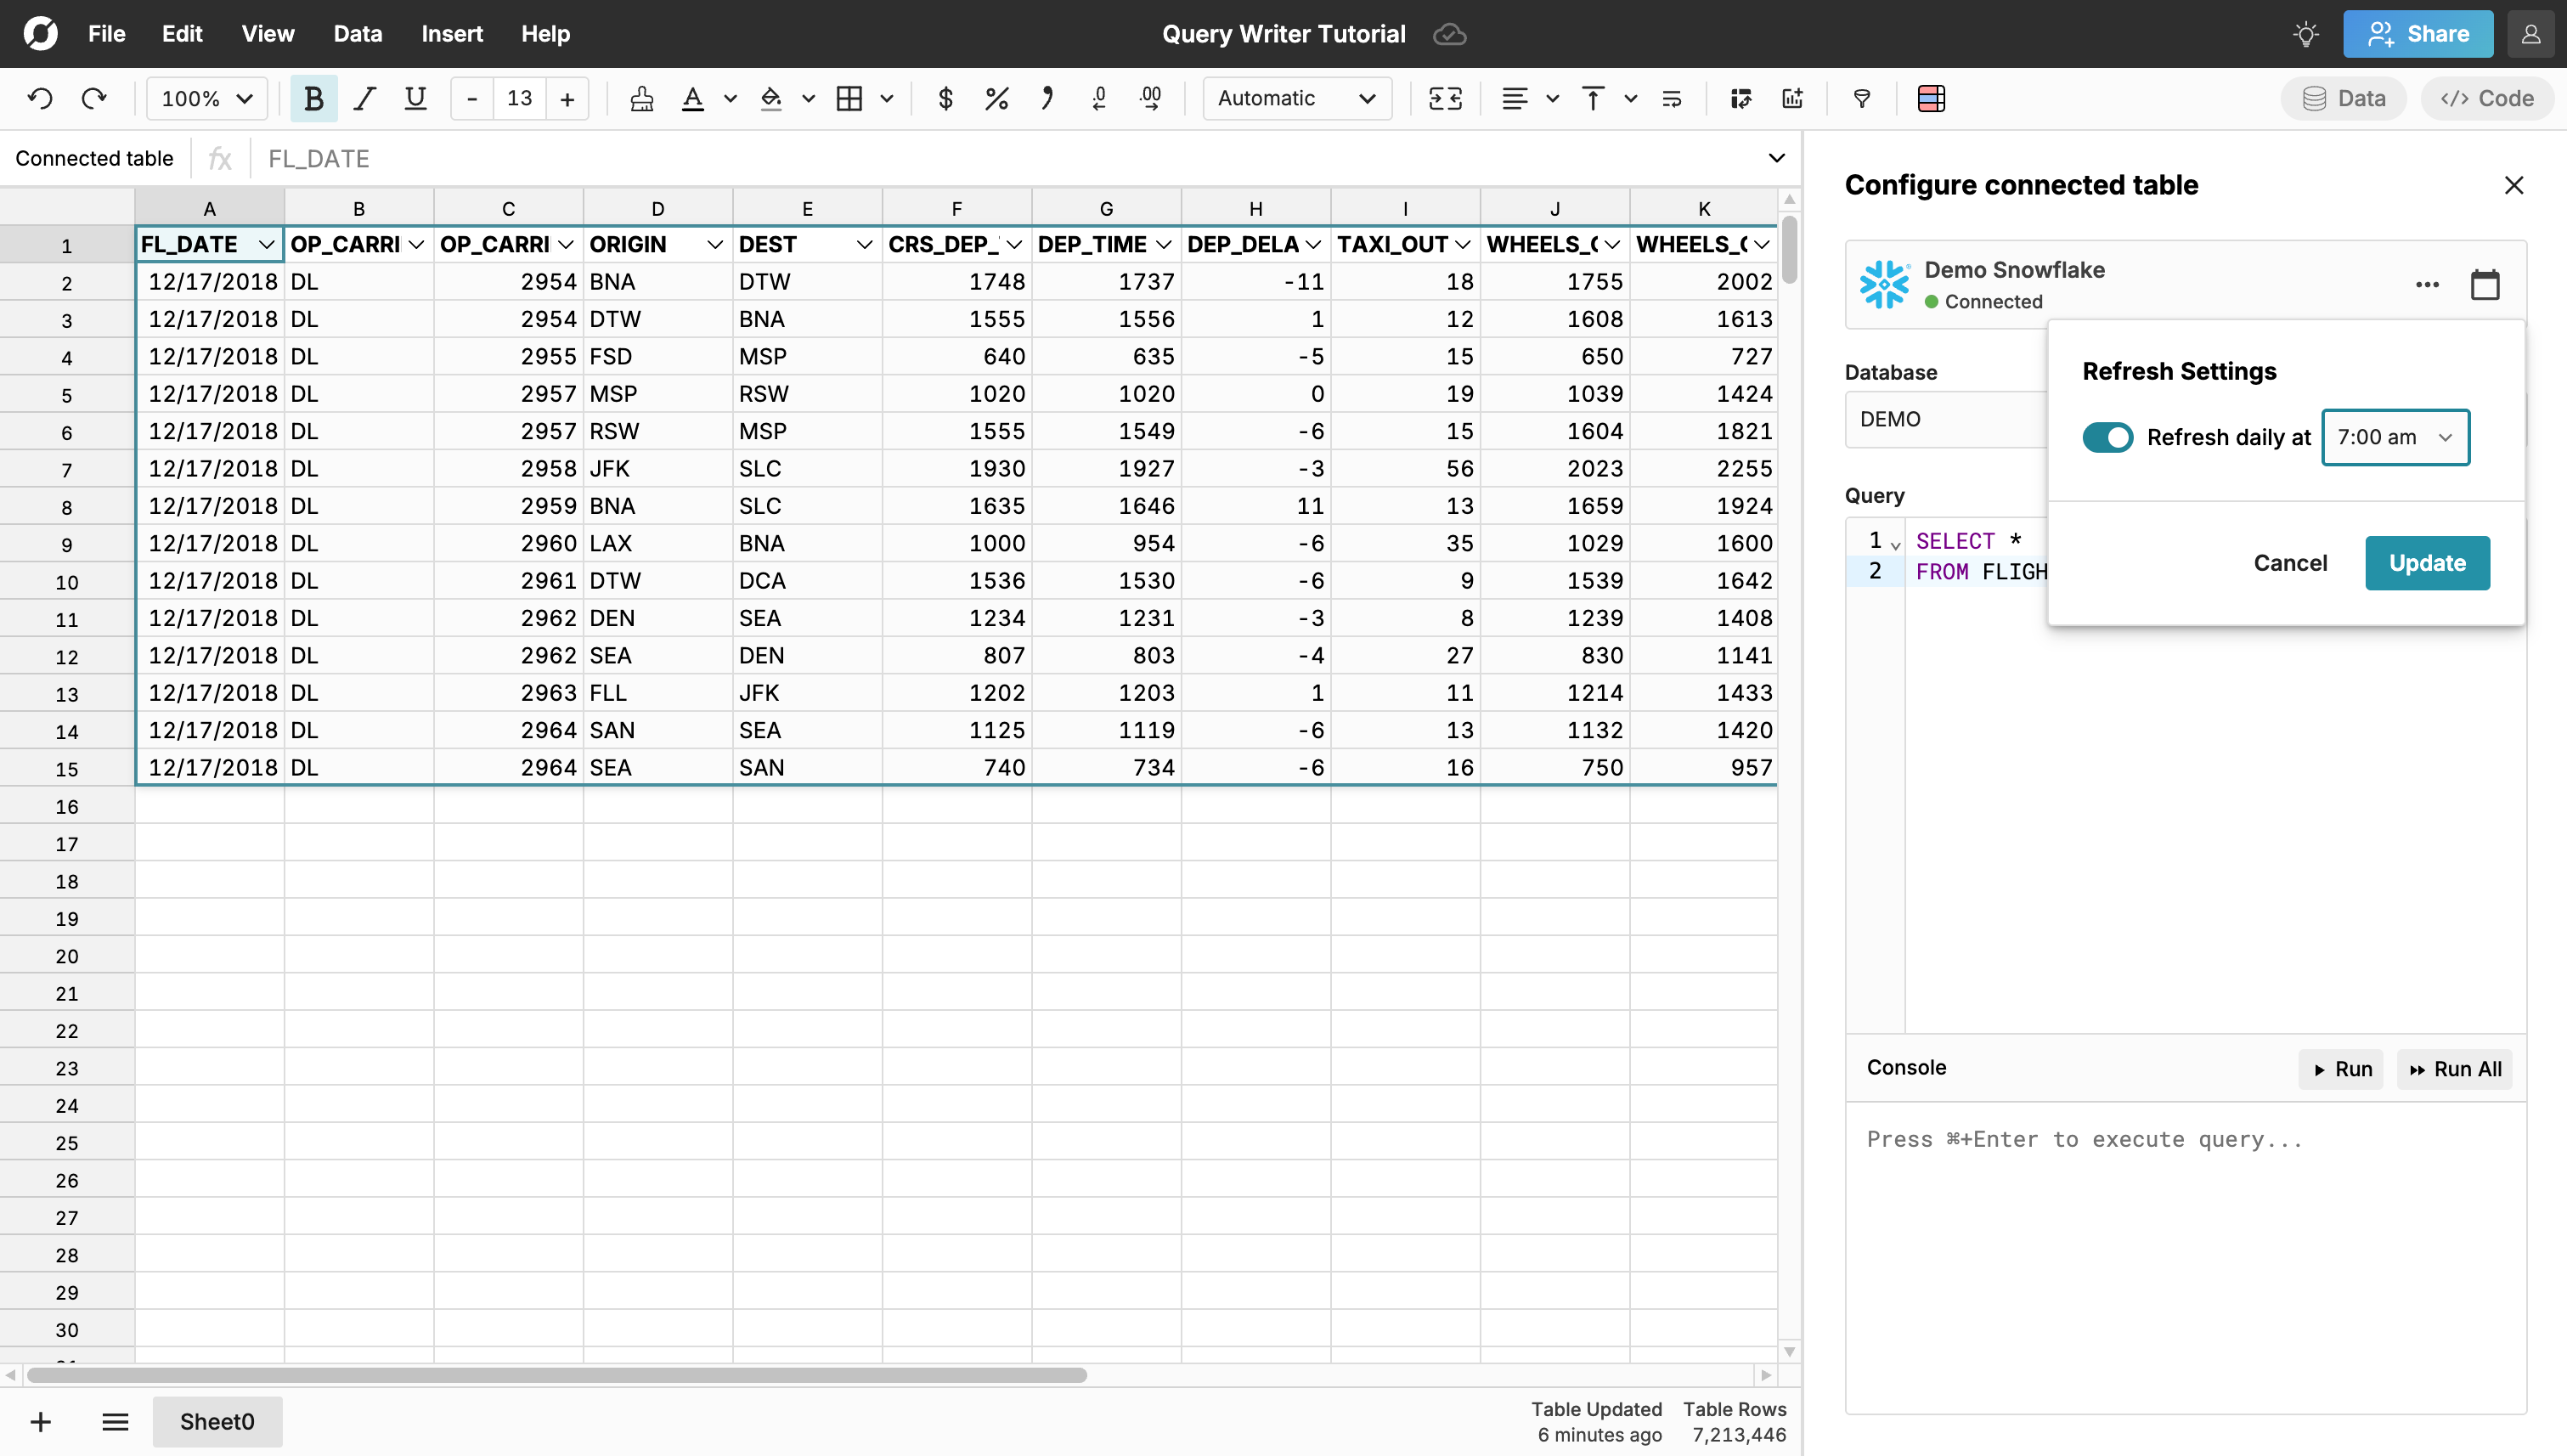
Schedule an Automated Refresh
To ensure your workbook always has the latest data, schedule an automated refresh. Click the calendar icon next to the connection name in the Configure connected table side panel, switch the refresh toggle to On, select a time, and then click Update.
Anytime the query backing your connected table is run, the table refreshes with the latest query results, and everything downstream (pivot tables, charts, formulas, etc.) updates automatically. Learn more about using pivot tables, charts, and formulas in the Tutorial for Spreadsheet Users.
Publish Your Data Source
In this section, you’ll publish your query as a reusable data source. Data sources provide an easy, no-code way to give other users access to data, ensuring everyone works from the same source of truth.
Create a Data Source
Open the Configure connected table side panel for the connected table you created in the previous step. Click … next to the connection name, and then select Publish as data source.
Note: If you have not yet run the query or if your query has changed since it was last run, you will need to run it before you are able to publish it.
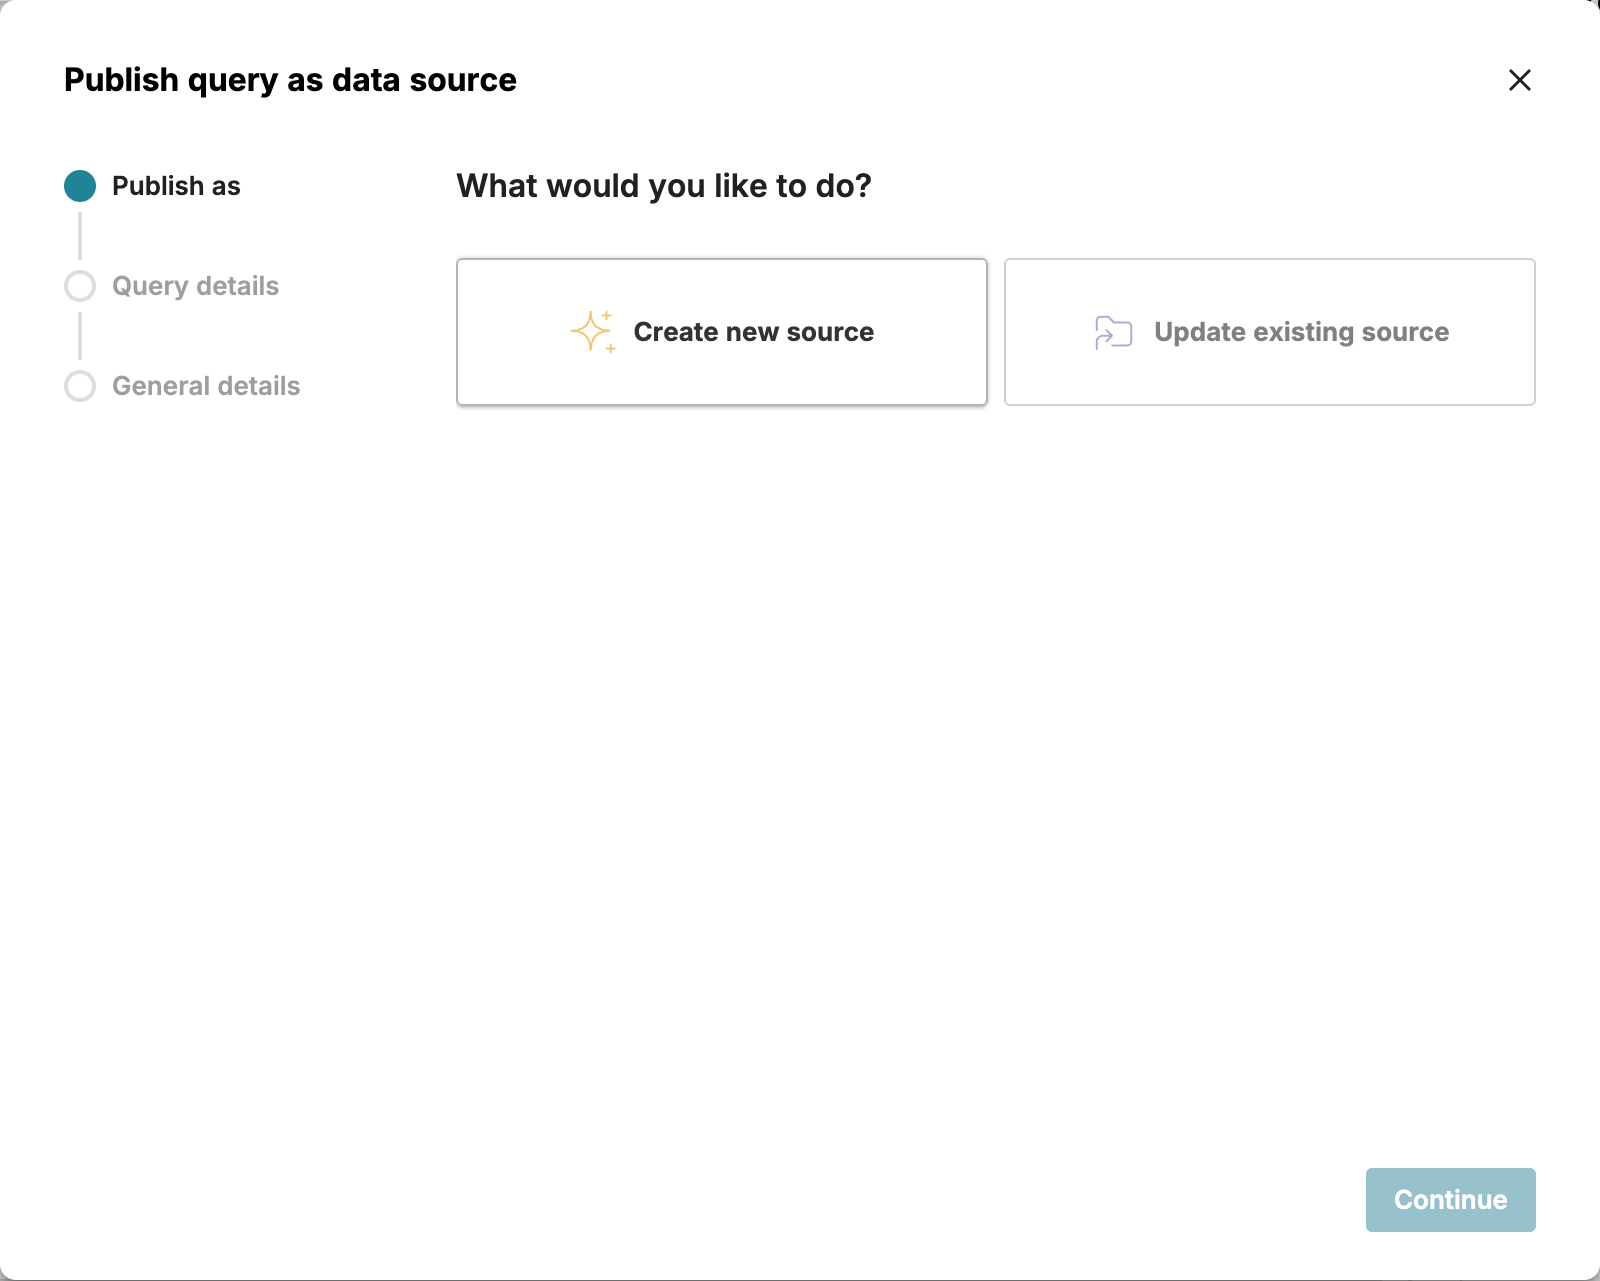
A new dialog box will open, and take you through the publish workflow.
- Select Create new source.
- Review your query details and click Continue.
- Give your data source a name and description, and click Continue.
- Review the Connection details and click Create data source.
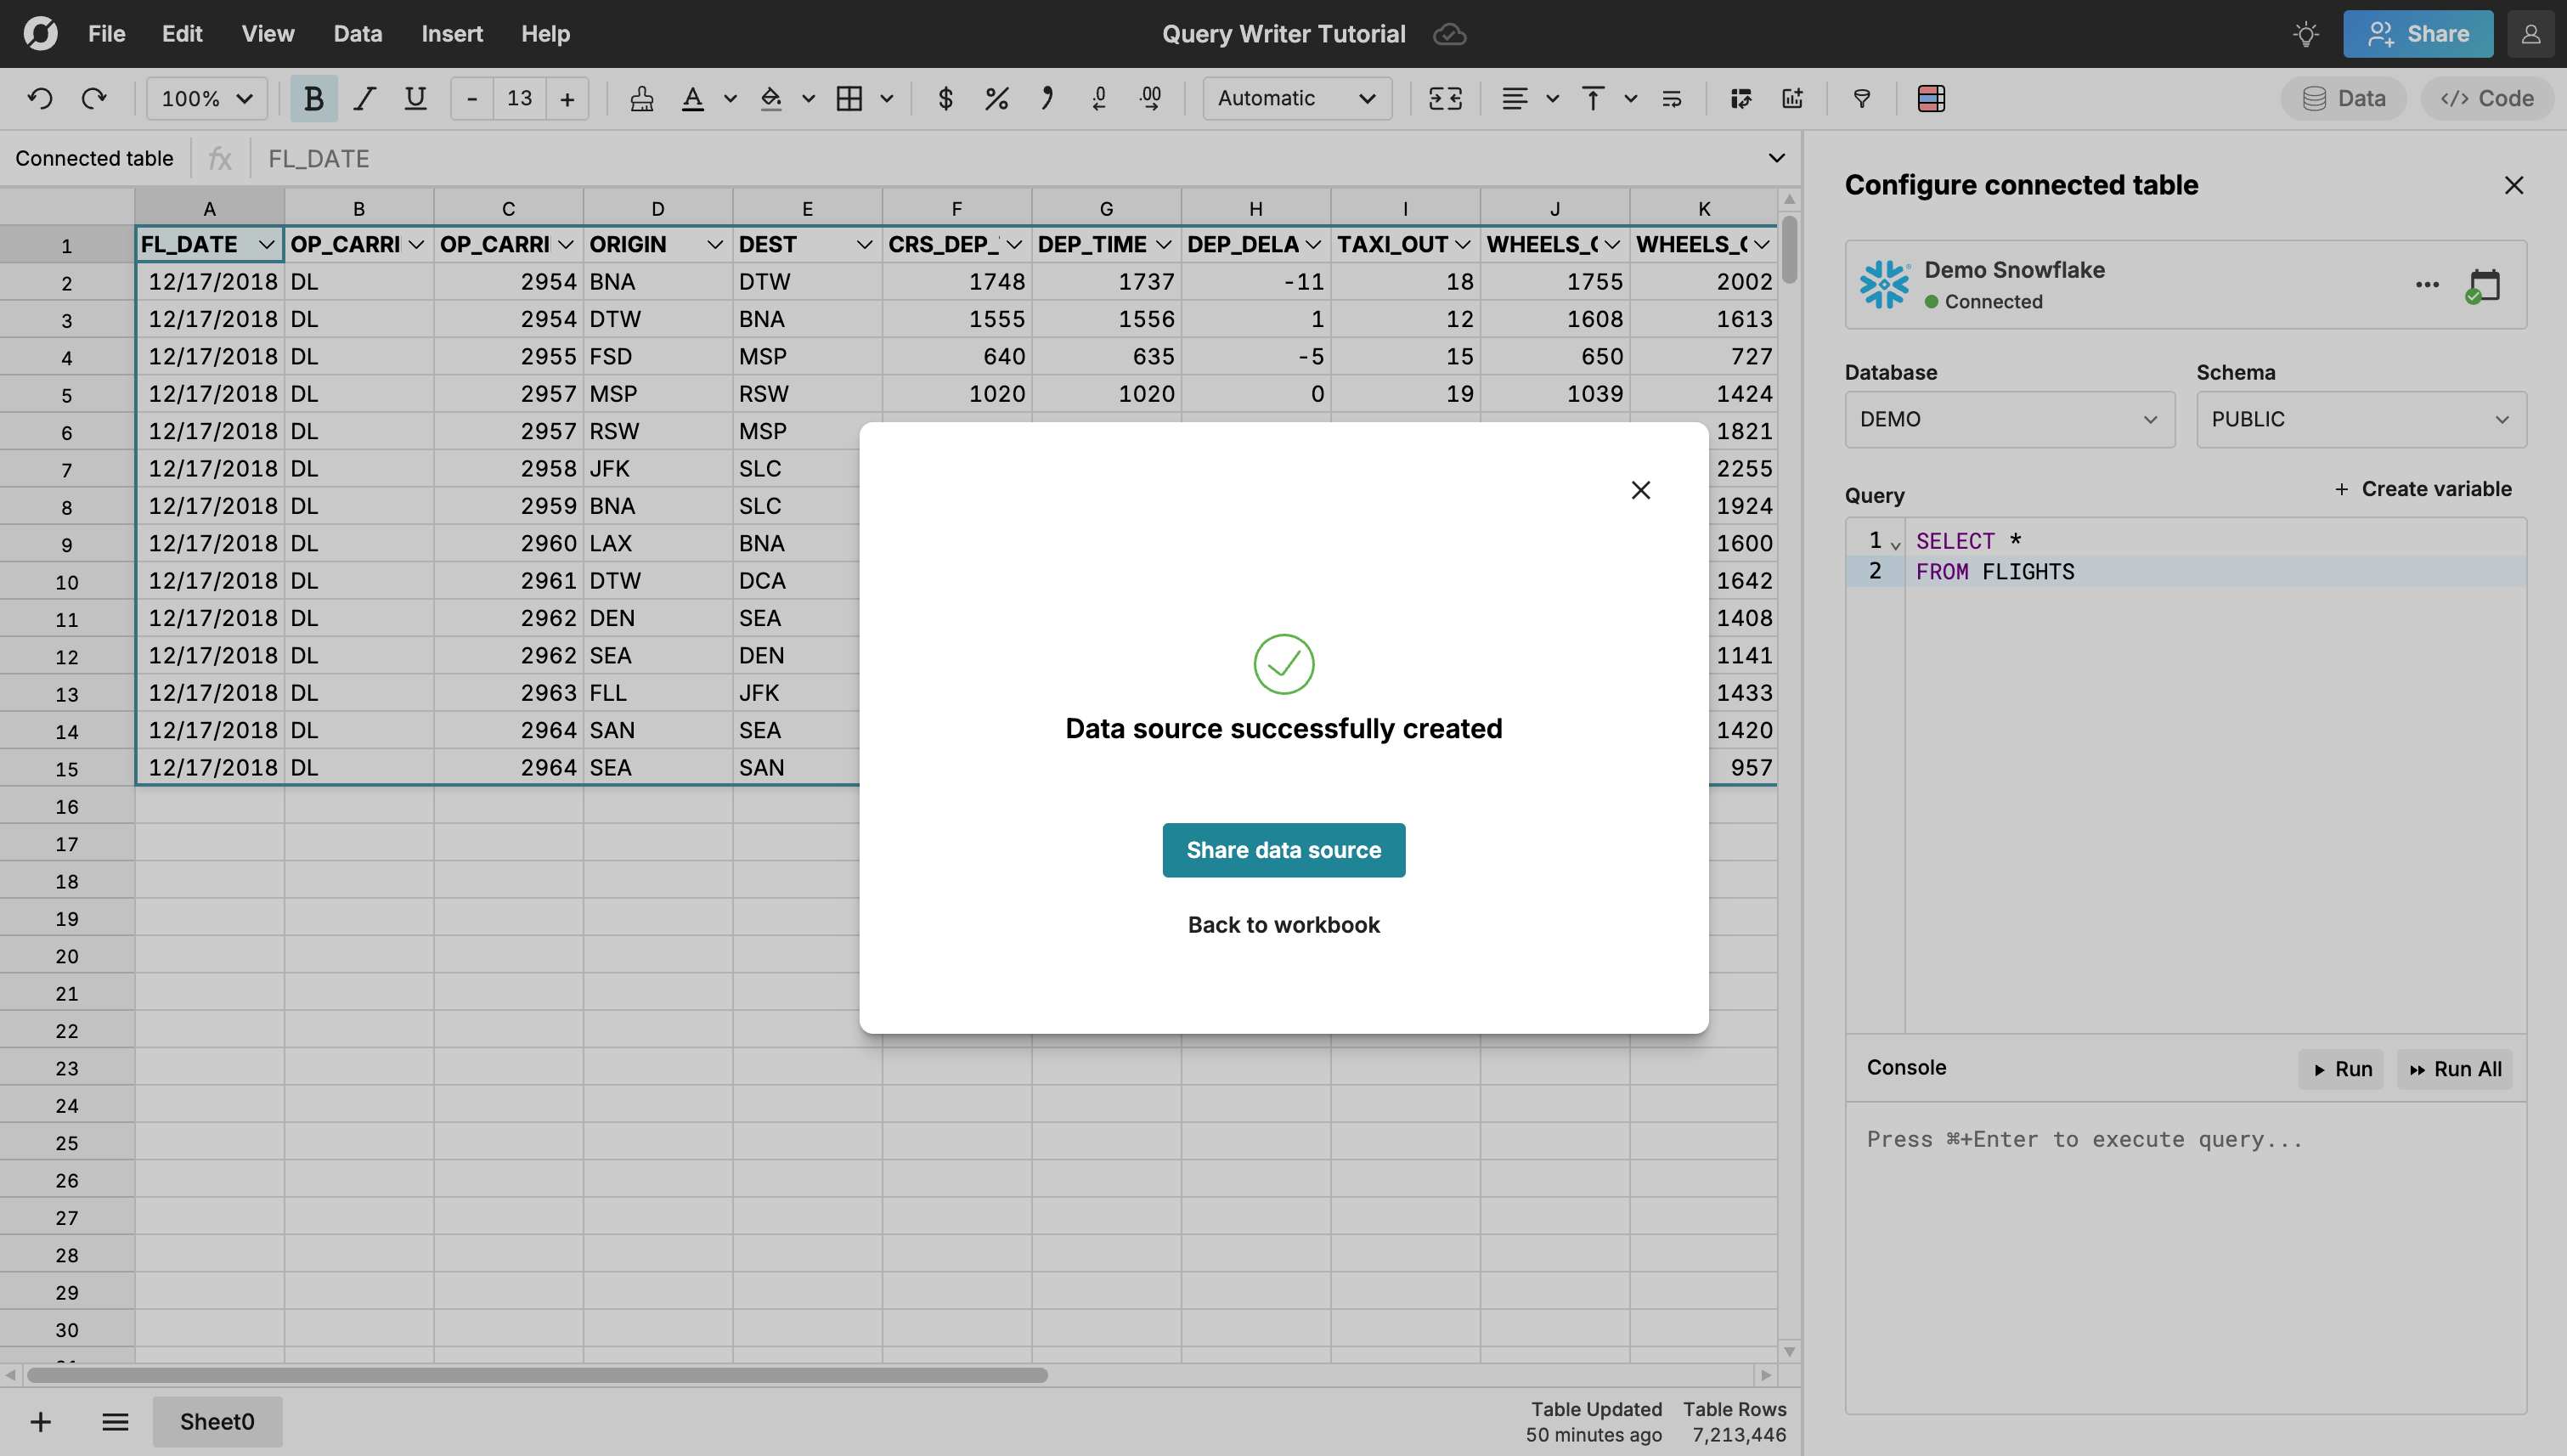
Share a Data Source
Once you have created your data source, you’ll be prompted to share it with other users. You can share with individual users or groups by entering their email addresses in the Share dialog.
Use a Data Source
The data source will be available to you (and to all users you share it with) in two places:
-
From any workbook: From your workbook, click Data to open the Data side panel and select the Data sources tab. Select your data source, choose your destination, and then click Insert data source.
-
From the Home screen: Recently accessed data sources will appear on your Home screen. You can access all of your data sources by clicking Data in the left sidebar menu. From the Data page, find your data source, and then click New workbook. You can also click on the name of the data source to modify sharing settings, change the connection, edit the name and description, and review query details.
The data source will open in a new connected table. Using data sources is covered in more detail in the Tutorial for Spreadsheet Users.
Modify a Data Source and Add Query Variables
One benefit of using data sources is that any updates you publish automatically propagate to workbooks using that data source, ensuring everyone works from the same source of truth. In this section, we'll modify your existing data source and add query variables to enable users to filter data during import.
Update Your Data Source
You can update your data source from any connected table. For simplicity, we’ll reuse the connected table you used to create your data source above.
- Reopen the workbook (titled “Query Writer Tutorial”) you created above.
- Open the Configure connected table side panel for your Connected Table.
- Modify your SQL query. For this tutorial, this can be a minor update – simple tests like adding or removing columns or limiting rows are good options. Click Run.
- When your query completes, click … next to the connection name and then Publish as data source.
- Select Update existing source. Choose the name of the data source you want to modify, review the changes, and click Update data source.
Add Query Variables
When creating a data source, you can optionally create query variables to enable users to filter data when importing to their sheet. This is useful in cases where your datasets are very large or very wide.
To add a query variable to your existing data source, you’ll again modify the query in the Connected Table you published above.
- Open the Configure connected table side panel for your connected table and click + Create variable.
- Name your variable, select your variable type (text, dates, numbers, or user emails), optionally assign a default value, and click Create.
- Update your SQL query and assign the query variable using a
WHEREclause and double braces{{ }}. For example, if your variable is nameddate, you could add this code to your query to filter to all results after the variable date:
WHERE FL_DATE >= '{{date}}'. - Click Run.
- Publish an update to your data source by following the instructions above. You can test your data source by opening it in your existing workbook or a new one.
Next Steps
Congratulations! You have successfully completed the Row Zero tutorial for query writers. You are now equipped to:
- Import Data: Connect directly to your data warehouse and import massive datasets into a Row Zero workbook.
- Govern and Share: Publish your self-service data sources, establishing a single source of truth for your entire organization.
- Optimize Performance: Utilize query variables to allow end-users to filter data during import, ensuring all downstream reports and workbooks remain fast and performant.
As you continue building data sources, consider how your users will access the data and what datasets will be most useful. Selecting the right connection type ensures proper permissions and security, while following best practices keeps your data sources performant, reusable, and reliable.
Designing Effective Data Sources
Choosing the Right Connection:
Data sources can be backed by either OAuth connections or service account connections. Your end user will not be able to change the connection associated with the data source, so it’s important that you select the correct one when writing your query:
- OAuth connections: If you create a data source using an OAuth connection, any user you share it with will use their own credentials to run the data source. This is a good choice if your users have individual data warehouse accounts or if your organization enforces row-level security (RLS)
- Service account connections: If your intended data source users do not have their own accounts to your data warehouse, you should use a connection backed by a service account. If you create a data source using a service account connection, the data source will always be run using the service account credentials.
Data Source Design: To balance flexibility with control, design your data sources around two types of use cases:
- Core entities (unaggregated data): Create a data source for each foundational table or entity — for example, “Orders,” “Customers,” or “Contracts.” These give non-technical users direct, governed access to granular data. Users can then join, filter, and summarize that data using standard spreadsheet operations. For very large datasets, add query filters (e.g., date range or key variables) to keep results performant.
- Common queries or reports: Build data sources for frequently used metrics or business reports. This establishes a consistent, auditable “source of truth” and eliminates duplicated SQL or manual extracts.
Further Exploration
Check out the rest of our documentation site for information about specific features or learn more about spreadsheet features with our Tutorial for Spreadsheet Users.