Data Import
Row Zero imports data two ways.
- A file import loads a file into your workbook.
- A connected table runs a live query against a warehouse that you have connected. Connected tables can be backed by a pre-built data source or a query created by you or with help of the AI Agent.
File import
Row Zero has three options to import files into your workbooks:
- Import file: upload from your computer
- Import from URL: import from a link
- Import from Amazon S3: import from an S3 bucket
Row Zero supports multiple file types including CSV, TSV, TXT, Parquet, JSONL, XLSX, and GZ.
Free, Pro, and Business users can import files up to 5 GB. Enterprise users have access to larger workbooks to support larger imports.
Import from your computer
To upload a file from your computer:
- In the Data menu, click Import files.
- Choose the file to upload.
- Click Import.
Import from URL
To import a file hosted at a public link:
- In the Data menu, click Import from URL.
- Enter the file URL.
- Click Import.
Google Drive
Google Drive share links point at a preview page rather than the file itself, so Row Zero cannot read them directly. To import a file stored in Google Drive, convert the link to a direct download URL first, using this URL structure: https://drive.google.com/uc?export=download&id=INSERT_FILE_ID_HERE
Replace <file_id> with the ID from the Drive share link, then import that URL. See Open files from Google Drive and Sheets for more tips.
Import from Amazon S3
To import a file from an S3 bucket you have connected:
- In the Data menu, click Import from Amazon S3.
- Select the connection, then the bucket and file.
- Click Import.
Note: See Connect Amazon S3 to Row Zero to set up bucket access.
Update an imported file
A file import does not refresh on its own. To bring in a newer version of the same file, import it again to the same location. Formulas, charts, and pivot tables built on that data automatically recalculate against the new values.
This video tutorial covers updating imported files using data tables:
Troubleshooting data imports
There are a number of reasons files fail to import. See Troubleshooting data imports for tips.
Connected tables
A connected table runs a query against a connection and imports the results into your workbook. The query can be refreshed any time, and business and enterprise users can also schedule it to refresh automatically.
Connected tables can be backed by a data source or custom SQL query. Custom SQL can be written yourself, built with the point-and-click query builder, or written with the help of the AI Agent.
Before you start
To create a connected table, first create a connection. Row Zero connects to Athena, BigQuery, Databricks, Oracle, Postgres, Redshift, S3, Snowflake, SQL Server, and Teradata. See connection documentation to create a new connection.
Insert a connected table from a connection
There are three ways to write a custom SQL query from a connection: users can use the point-and-click query builder, they can write custom SQL using the SQL editor, or they can use the AI Agent.
Custom queries using SQL editor and query builder
To insert a connected table from a connection:
- Go to Insert > Connected table, then choose From a connection.
- On the Connections tab, select a connection.
- Depending on what database or warehouse you use, you will need to choose a data store (e.g. Database, Schema, Catalog, etc.).
- Build your query in the query builder or the SQL editor.
- Query builder: Select columns from a single table, view, or semantic view. To select all columns in the table with a single click, drag the table name into the “Fields” section.
- SQL editor: Write custom SQL from multiple tables, views, or semantic views.
- Click Run query.
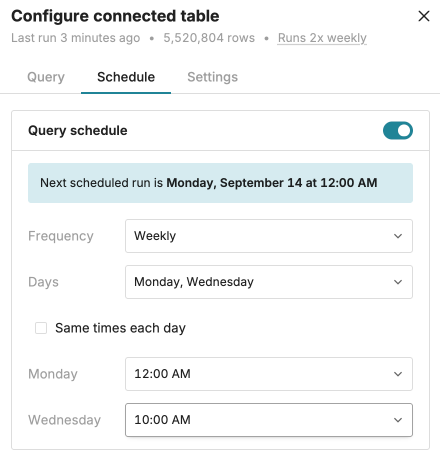
Row Zero imports the results into a connected table. You can update the selected columns, refresh the query on demand, or set a refresh schedule from the Configure connected table side pane any time.
Note: You can switch between query builder and SQL editor by clicking Switch to SQL editor or Switch to query builder above the query area. Once you edit the SQL, you cannot return to the query builder version of that query.
AI-generated queries
Users with AI enabled can also use the AI Agent to write queries using natural language prompts. Row Zero uses the semantic layer configured in your data warehouse to generate the query, then brings the result back into Row Zero as a connected table. See AI Agent for more information.
Insert a connected table from a data source
A data source is a published, reusable query. Inserting one requires no SQL, because the query is already written. This is an easy way to give users one-click access to live updating data from governed datasets.
To insert a data source:
- Go to Insert > Connected table.
- On the Data sources tab, scroll or search for the data source you want. Search matches names, descriptions, and column names.
- Select a data source to view the description and column names in the panel on the right.
- Click Insert into workbook.
- In the Insert data source dialog, set the Destination, update query variables (if any), and then use Pick columns to choose which columns to import.
- Click Insert data source.
Row Zero imports the results into a connected table. You can update the selected columns, refresh the query on demand, or set a refresh schedule from the Configure connected table side pane any time.
To publish a query for your team to use this way, see Shared data sources.
Working with connected tables
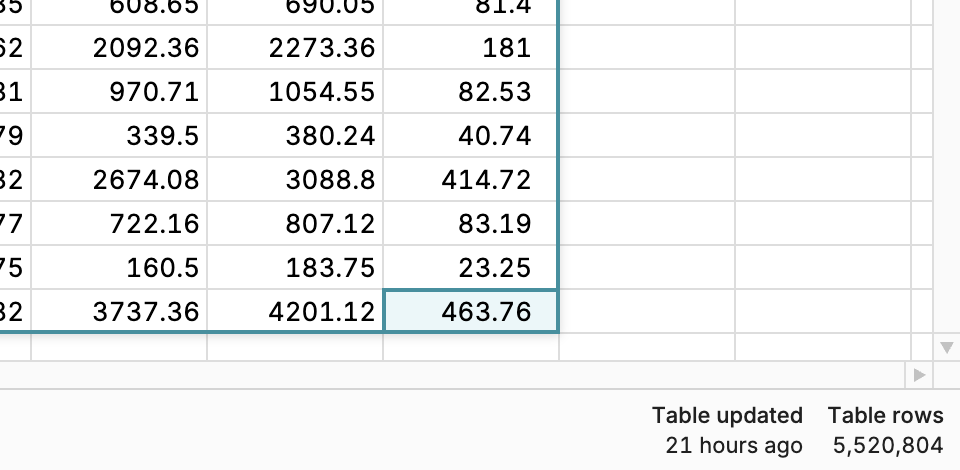
Row Zero imports query results into a connected table. Column headers and data types come from the query. When you click in a connected table, you can see when it was last updated in the bottom right of the workbook, along with the number of rows in the table.
Choosing a table mode
Connected tables have two modes:
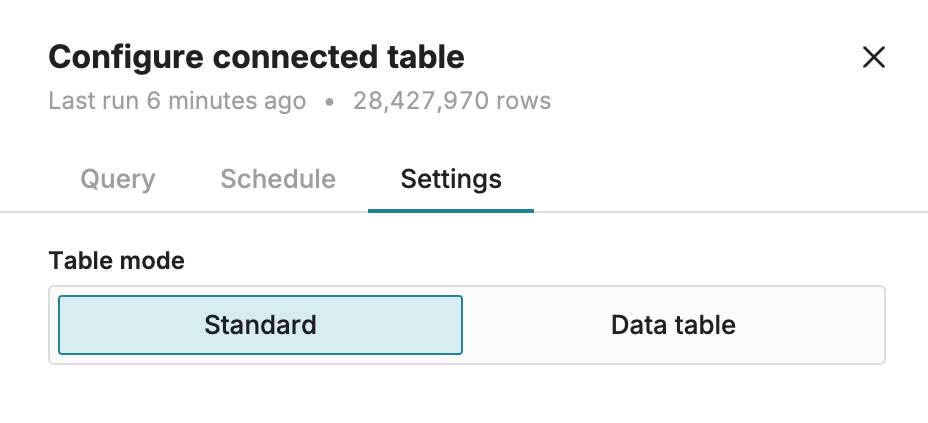
- Standard mode: results spill into the sheet's cells, starting at the anchor cell. Each value occupies its own cell.
- Data table: results display in a data table on top of the sheet grid. The data table takes up the same space no matter how many rows the query returns.
New connected tables use the mode you chose most recently. You can switch a connected table between modes at any time.
To change the mode of a connected table:
-
Click Table details to open the Configure connected table side pane.
-
Select the Settings tab.
-
Under Table mode, select Standard or Data table.
Referencing connected tables in formulas
Formulas can reference connected tables using column references in both data table and standard mode, and cell references in standard mode.
Column references name a column by its header name. See Data Tables for more detail.
- Full column references include both the anchor cell and the header name. The cell before the brackets is the connected table's root cell. For a connected table rooted at
A1, this formula sums theORDER_TOTALcolumn:=SUM(A1["ORDER_TOTAL"]). - Sibling column references return a columns value in the corresponding row. Use them in a column next to the connected table to calculate a value for every row. For example,
={ORDER_TOTAL} * 0.08returns 8 percent of each order total.
Cell references point at the cells the results spill into, like any other range. They work only in Standard mode. For example, if ORDER_TOTAL spills into column D, =SUM(D:D) returns the same total, assuming there is no other data in column D.
Tip: Use column references in formulas that need to survive a change to the query. A column reference follows its column by name. A cell reference such as
D:Dpoints at whatever column lands in D.
Refresh connected tables
Users can refresh queries on demand or on a schedule. Any time the query is refreshed, the data in the connected table is updated with the latest query results. Everything downstream of the connected table (pivot tables, charts, formulas, etc.) also automatically updates.
To rerun your query:
- Click Table details to open the Configure connected table side pane.
- Click Run query to refresh a connected table on demand.
To refresh on a schedule:
- Click Table details to open the Configure connected table side pane.
- Select the Schedule tab.
- Turn on the Query schedule and choose your schedule.
Your query schedule will appear in the header.
Scheduled refresh is available to Business and Enterprise customers.