Single Sign-On SAML Integration - Microsoft Entra
If you have an Enterprise account in Row Zero, you can configure single sign-on (SSO) via SAML 2.0 using your organization's existing Microsoft Entra SSO provider. Row Zero supports SAML 2.0 for single sign-on with HTTP-POST binding.
Prerequisites
Before starting, ensure you have administrator access to Microsoft Entra ID.
Step 1: Create an Enterprise Application
Log into the Microsoft Entra admin center.
-
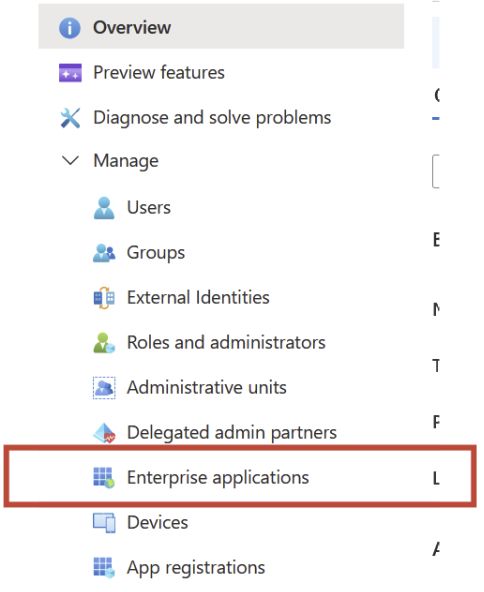
Navigate to your company’s Microsoft Azure Home and in the left navigation menu of the, select Enterprise applications.
-
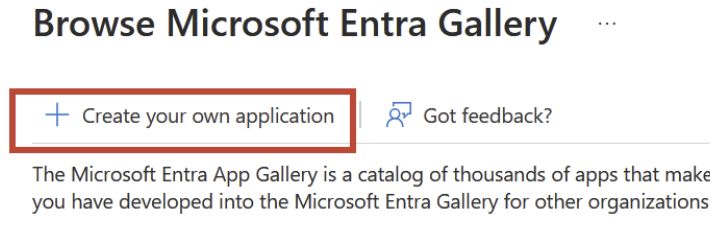
Click + New application

-
Choose + Create your own application
-
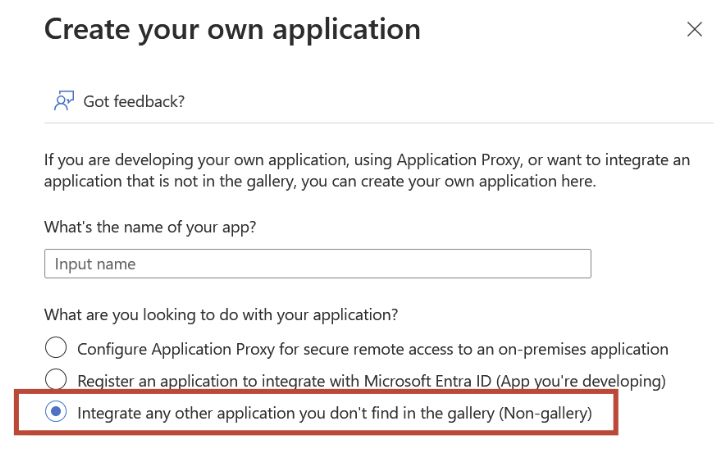
Enter Row Zero as the application name and select Integrate any other application you don’t find in the gallery (Non-gallery).
-
Click Create
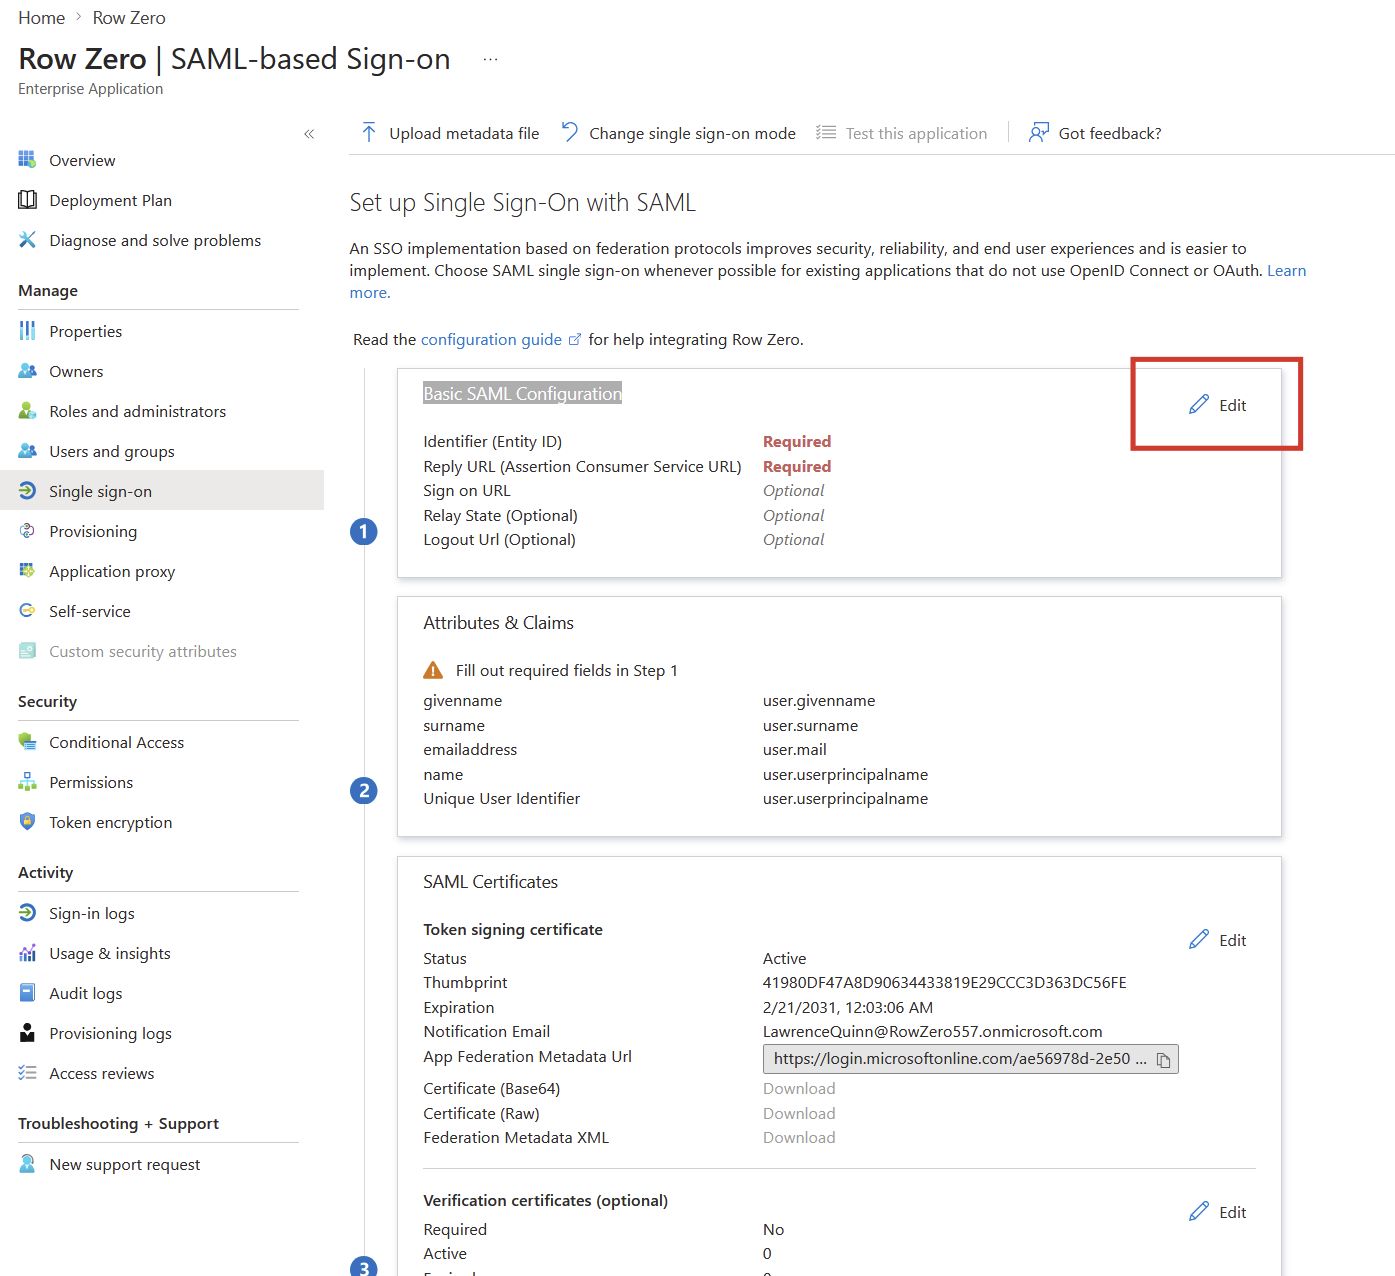
Step 2: Configure SSO
-
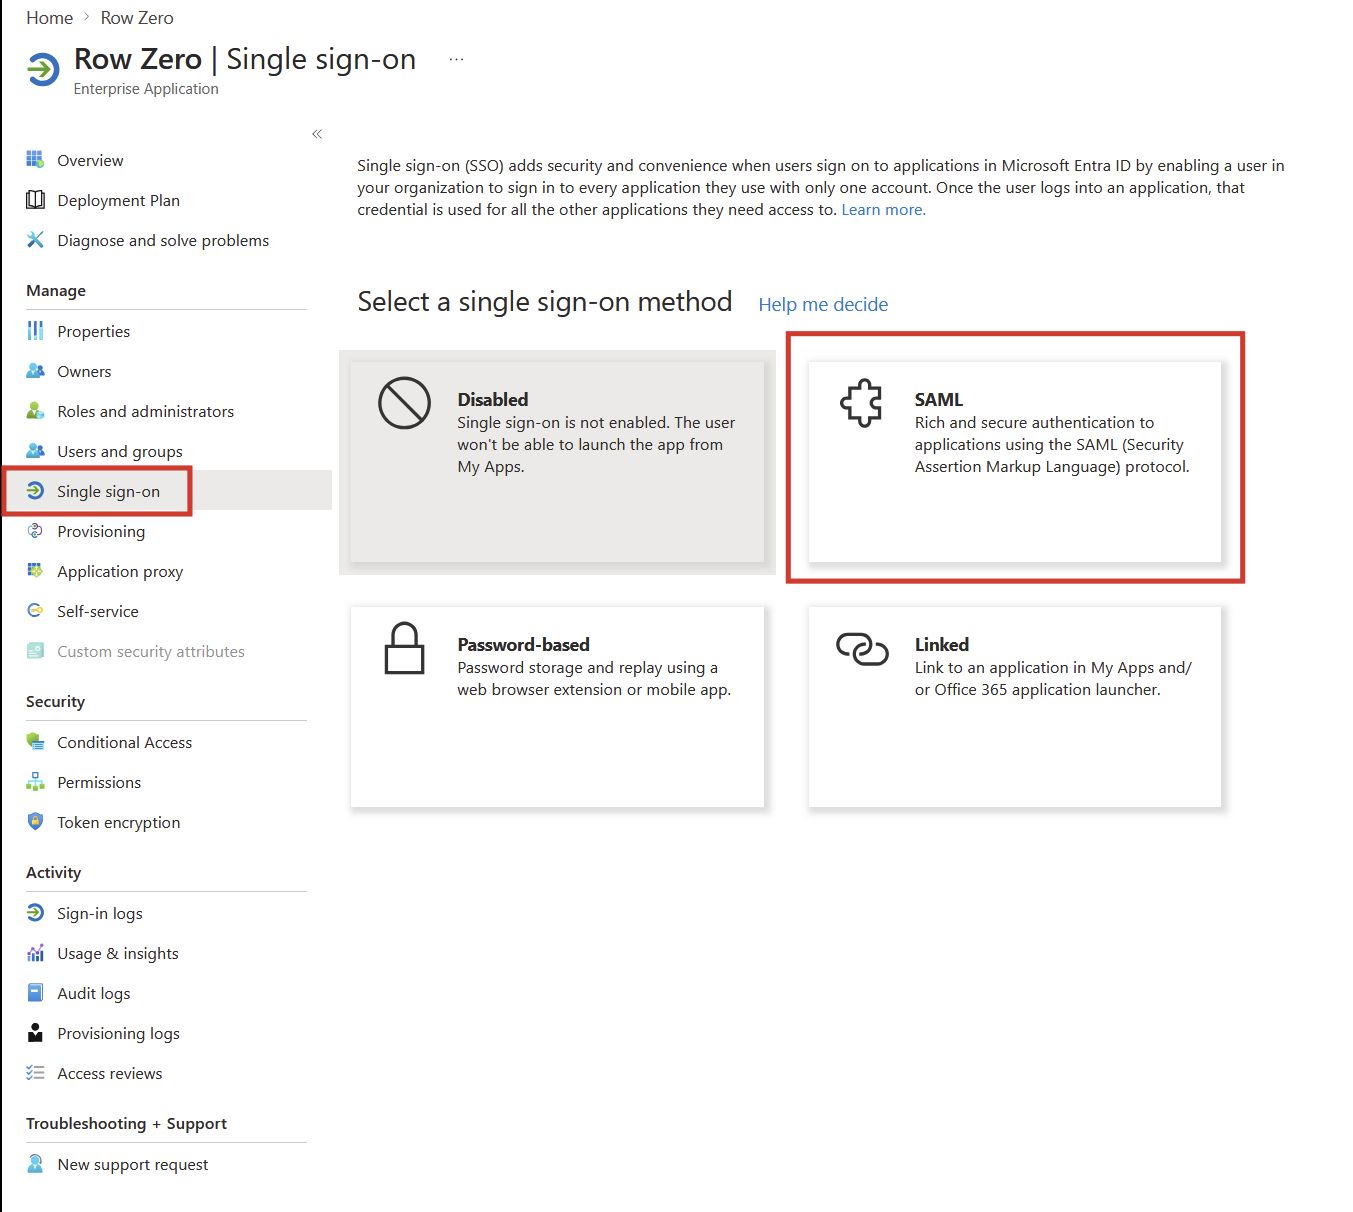
Once the enterprise application is created, click on “Single sign-on” in the left tab and click “SAML”:
-
Under “Basic SAML Configuration” click the “Edit” icon:
-
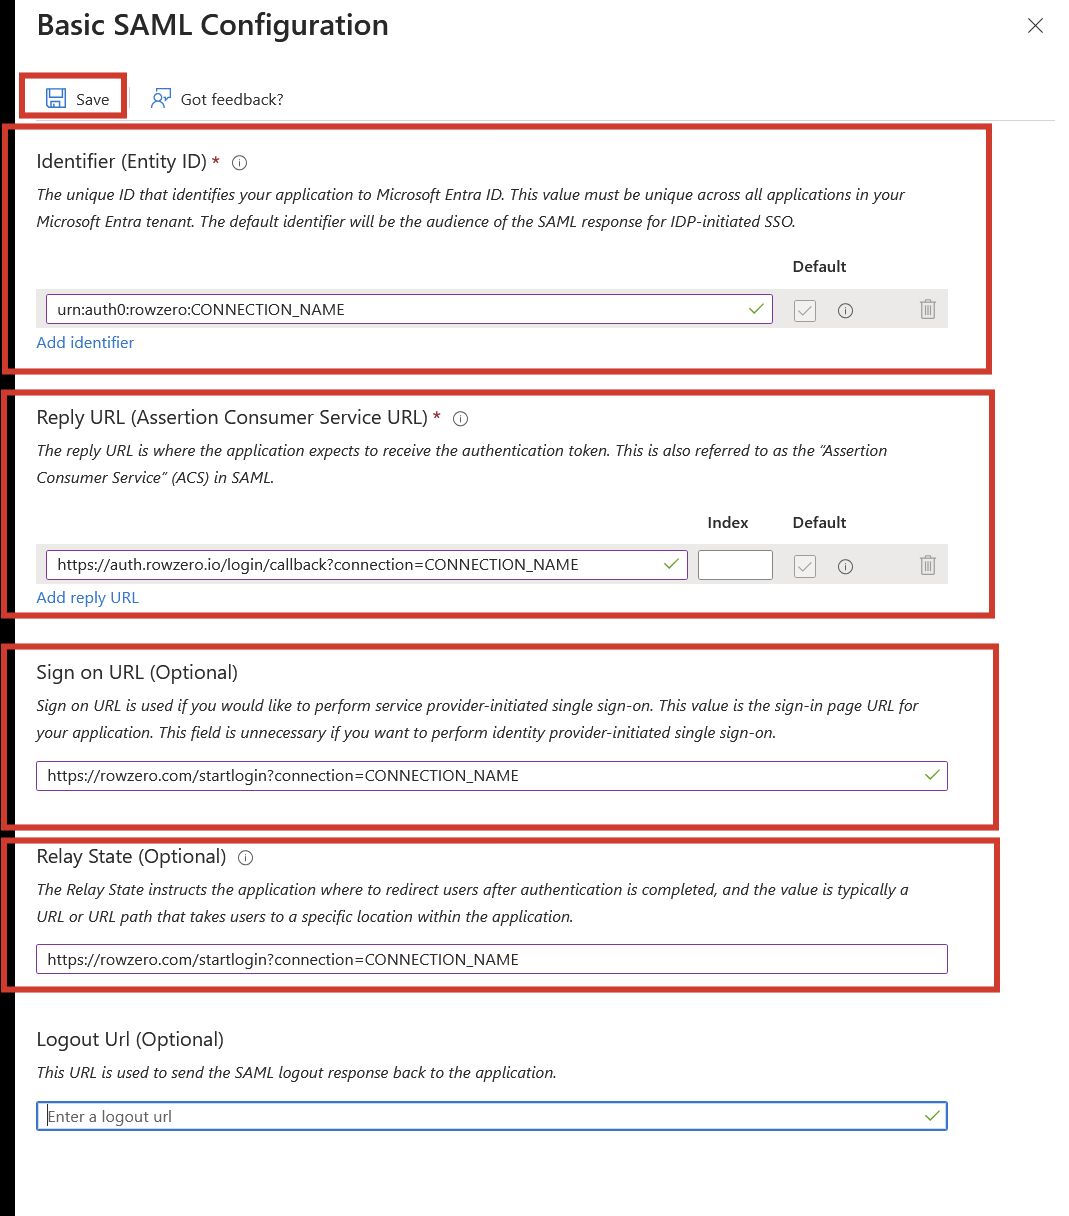
Under “Basic SAML Configuration” populate the following and click “Save” (Note: You will need to replace CONNECTION_NAME above with an identifier that Row Zero will provide; contact us when you are setting up your SSO integration and we will give you the CONNECTION_NAME to use):
-
Identifier (Entity ID) - urn:auth0:rowzero:CONNECTION_NAME
-
Reply URL (Assertion Consumer Service URL) - https://auth.rowzero.io/login/callback?connection=CONNECTION_NAME
-
Sign on URL (Optional) - https://rowzero.com/startlogin?connection=CONNECTION_NAME
-
Relay State (Optional) - https://rowzero.com/startlogin?connection=CONNECTION_NAME
-
-
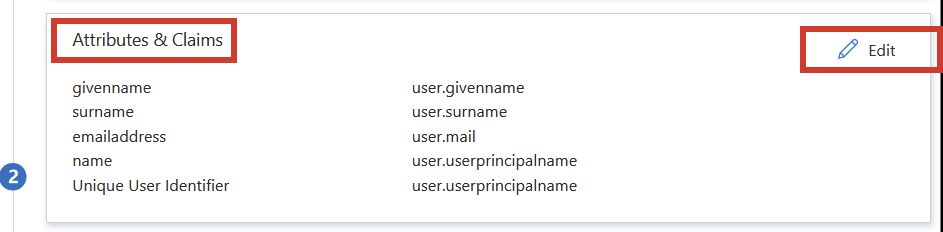
Under “Attributes & Claims” click the “Edit” icon:
-
Click “+ Add new claim” to establish both “email” and “email_verified” claims:
-
Note: For the “email” mapping, make sure it’s mapped to an attribute that is populated for each user. This attribute can be different for every user definition.
-
Note: For “email_verified” utilize the transformation “ToLowercase (user.accountenabled)” (or whatever user attribute that represents if an account is active) to produce a mapping to either “true” or “false”.

-
-
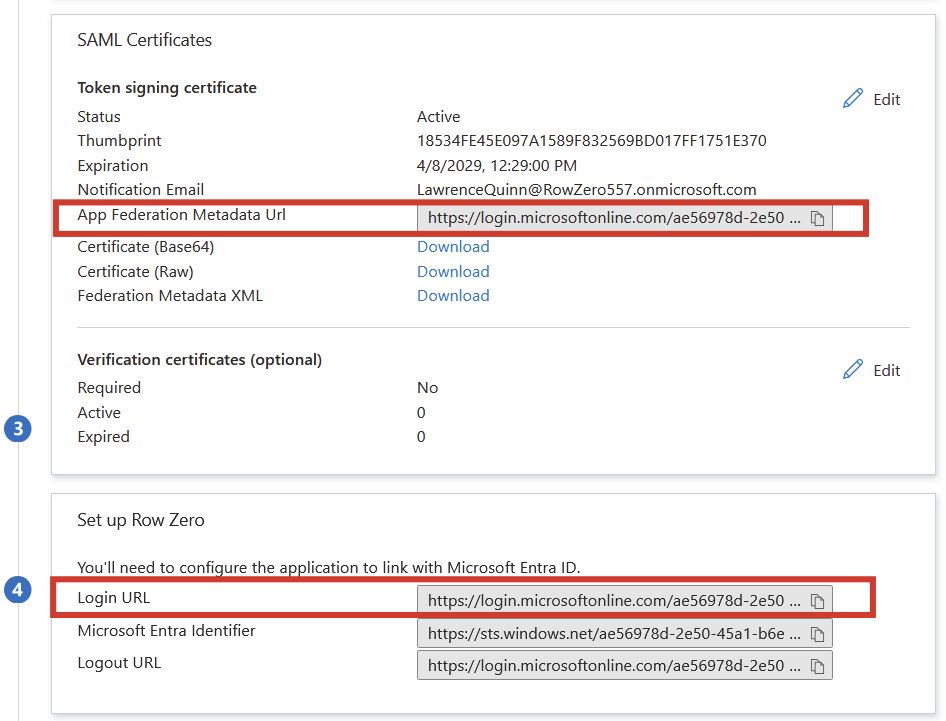
Provide Row Zero with the “App Federation Metadata URL” and “Login URL”:
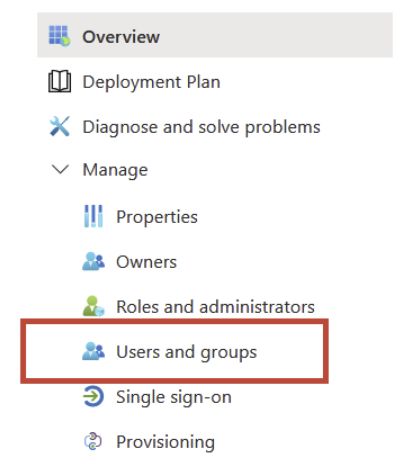
Step 3: Assign Users and Groups
You must assign users and/or groups to the application before provisioning will sync them to Row Zero.
-
Open the Row Zero enterprise application.
-
In the left panel, select Users and groups.
-
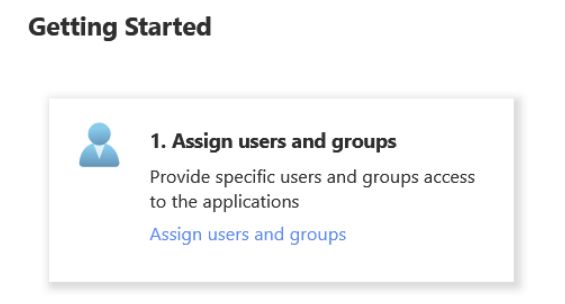
Under Getting Started, select Assign users and groups.
-
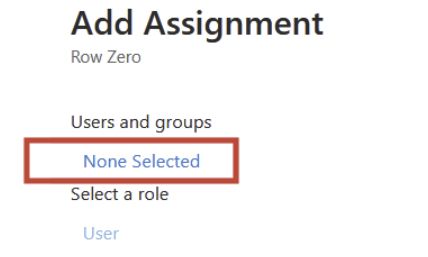
Click on Add user/group
-
Click None Selected to open the selection panel.
-
Choose the users and/or groups you want to provision into Row Zero.
-
Click Assign